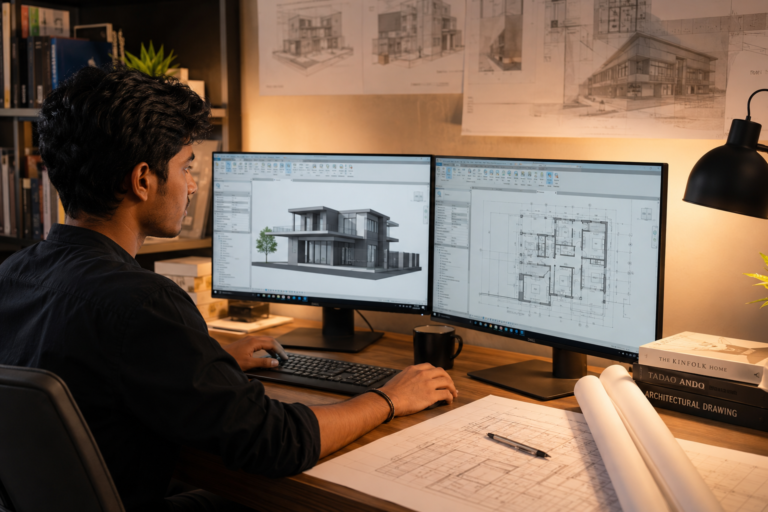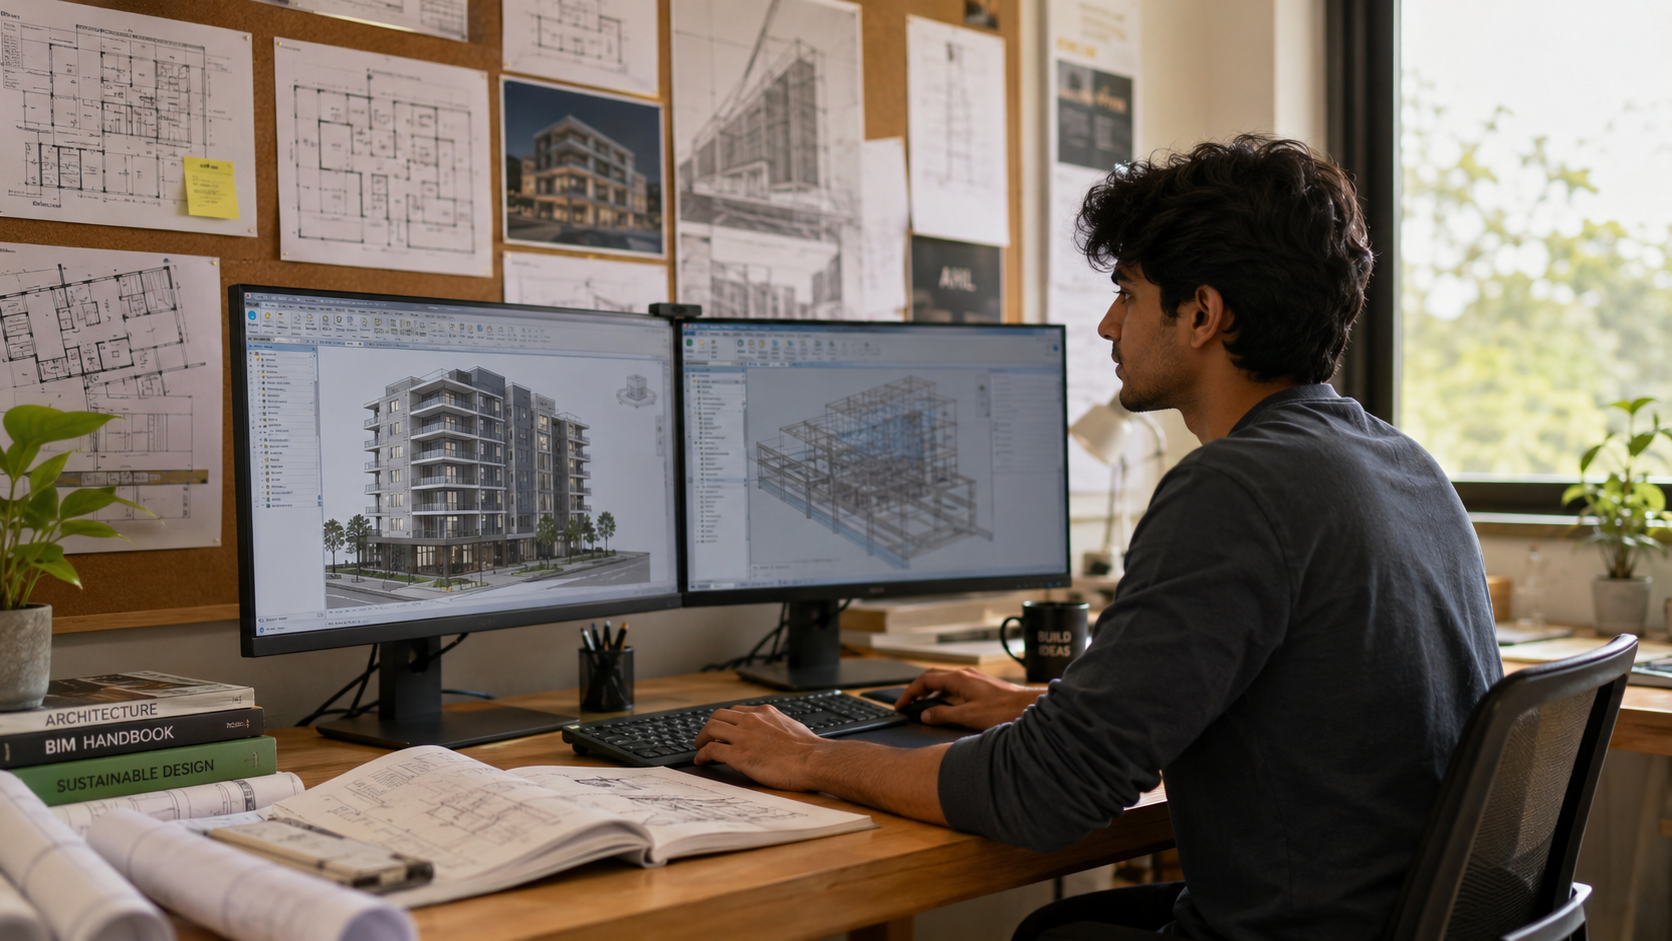
Revit Learning Roadmap for Beginners: Step-by-Step Guide

Who Is This Guide For?
This roadmap is designed for anyone starting their BIM journey. Wherever you are in your career, this guide meets you where you are.
🎓
Architecture Students
You need structured Revit skills to stand out in your final year and graduate job applications. This guide gives you a 12-week plan.
🏢
Junior Architects & Draftsmen
You are transitioning from AutoCAD to BIM. This roadmap shows you the fastest path to professional-level Revit output.
🌏
Self-Taught Learners
You are learning Revit from YouTube but feel lost without structure. This guide gives you a clear sequence from day one.
🔄
Career Changers
You are entering the AEC industry from another field. This guide explains BIM fundamentals before diving into software.
Quick Navigation
Jump to the section most relevant to you right now.
| 01 Section 1 What Is Revit? Understand the tool before you open it — history, purpose and why it matters globally. | 02 Section 2 BIM Fundamentals Learn the language of BIM before touching the software. |
| 03 Section 3 Interface Navigation Decode the Revit workspace so you never feel lost again. | 04 Section 4 Essential Modeling Skills Build walls, floors, roofs and stairs with confidence. |
| 05 Section 5 Documentation Skills Create professional drawings sets from your 3D model. | 06 Section 6 Family Creation Basics Build custom Revit components for any project type. |
| 07 Section 7 Collaboration Workflows Work on shared projects and avoid common team mistakes. | 08 Section 8 Portfolio Development Turn your Revit work into a portfolio that gets you hired. |
| 09 Section 9 Common Beginner Mistakes Avoid the errors that cost students weeks of lost work. | 10 Section 10 Building Your BIM Career Use Revit as a launchpad for a future-proof architecture career. |
Section 1: What Is Revit?
Before you learn Revit, you need to understand what it actually is. Most beginners open the software thinking it is just a fancier version of AutoCAD. It is not. Learning Revit with the wrong mental model will slow you down for months.
1.1 From Drafting Lines to Intelligent Buildings
AutoCAD draws lines. Revit builds buildings. When you draw a wall in Revit, it knows it is a wall. It has thickness, materials, height, and relationships with other elements. Change the wall type and every door, window, and material schedule connected to that wall updates automatically.
This is the core shift. You are not drafting. You are constructing a virtual building inside the software.
1.2 A Brief History of Revit
Revit was developed by Charles River Software in the late 1990s in the USA. Autodesk acquired it in 2002. By the 2010s, it became the dominant BIM authoring tool in architecture, engineering and construction globally. Today it is used from Mumbai to Melbourne, Toronto to Tokyo.
In India, the transition to Revit accelerated after the government’s Smart Cities Mission pushed for BIM adoption. In Australia, BIM is now mandatory on most public infrastructure projects. The Middle East, driven by large-scale developments in the UAE and Saudi Arabia, has one of the fastest-growing Revit user bases in the world.
1.3 What Revit Is Actually Used For
Revit is used across three main disciplines. Architecture for design and documentation. Structure for structural engineering models. MEP for mechanical, electrical and plumbing systems. On large projects, all three work inside the same federated model. As an architecture student, your focus is on the Architecture module.
1.4 Revit vs Other BIM Tools
| Tool | Best Known For |
| Revit (Autodesk) | Architecture, Structure, MEP — industry standard globally |
| ArchiCAD (Graphisoft) | Intuitive workflow popular in Europe and Australia |
| Vectorworks | Strong in performing arts and landscape architecture |
| Bentley AECOsim | Infrastructure and large-scale engineering projects |
| SketchUp + Sefaira | Early design + energy analysis, not full BIM |
Revit dominates in India, Southeast Asia, the Middle East and North America. In most job markets, Revit proficiency is the baseline expectation.
💡 CALLOUT
Revit is the most widely required BIM skill in architecture job postings globally. According to LinkedIn data, Revit appears in over 60% of architecture job listings in India, the UAE and the UK.
Section 2: BIM Fundamentals
You cannot learn Revit effectively without understanding BIM. BIM — Building Information Modeling — is the methodology. Revit is just one of the tools that delivers it.
2.1 What BIM Actually Means
BIM is not a software. It is a process. It means creating and managing a digital model that contains not just the geometry of a building, but all the information about it. Material specifications. Cost data. Energy performance. Construction sequences. Maintenance schedules.
Think of it as a database in the shape of a building. Every element you place in Revit carries information that can be extracted, scheduled and shared with the entire project team.
2.2 The BIM Levels Explained
| BIM Level | What It Means |
| Level 0 | No collaboration. Paper or 2D CAD drawings. |
| Level 1 | Some 2D and 3D work, but no sharing between teams. |
| Level 2 | Federated models shared between disciplines. Now mandatory in UK public projects. |
| Level 3 | A single shared model accessible by all in real time. The future standard. |
Most architecture firms currently operate at Level 2. As a Revit beginner, your goal is to master Level 2 workflows. That is what employers are hiring for right now.
2.3 The BIM Triangle: Model, Data, Process
Good BIM practice requires three things working together. The Model — the 3D geometry built in Revit. The Data — the information attached to every element. The Process — the agreed workflows your team uses to manage and update the model. Students often focus only on the model. Professionals think about all three.
2.4 Why BIM Matters for Your Career
Countries and clients are increasingly mandating BIM on projects. In the UK, BIM Level 2 has been required on all centrally procured government construction since 2016. Singapore has BIM submission requirements for planning. Hong Kong mandated BIM for public housing. India’s RERA and smart city initiatives are accelerating adoption.
Architects who cannot work in BIM are becoming professionally disadvantaged. The earlier you build these skills, the stronger your position in the job market.
✅ TIP
Start thinking like a BIM manager from day one. Ask yourself: what information does this element need? What will the contractor need to know from this model? That mindset will make you a better Revit user immediately.

Section 3: Interface Navigation
Opening Revit for the first time feels overwhelming. There are panels, ribbons, view controls and a properties palette all competing for your attention. This section gives you a clear map of the workspace so you can move confidently from the first session.
3.1 The Ribbon: Your Command Centre
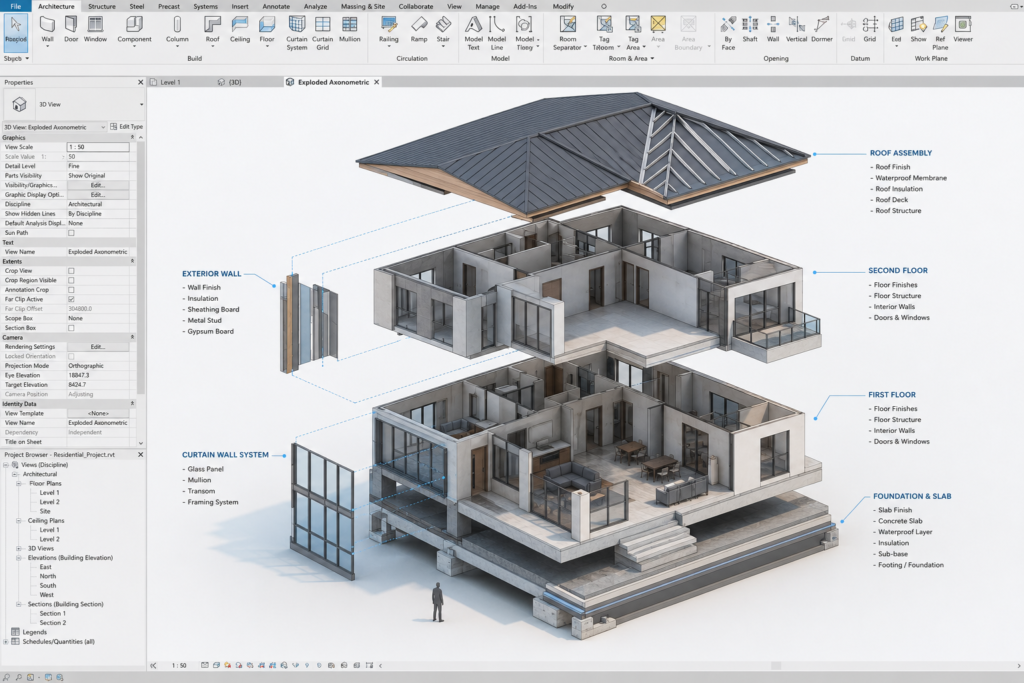
The Ribbon runs across the top of the screen and is divided into tabs. The Architecture tab is where you will spend most of your time as a student. Inside each tab are panels grouping related tools. The Build panel holds walls, doors and windows. The Datum panel holds grids and levels. The Room & Area panel lets you define and schedule spaces.
Do not memorise the ribbon. Understand its logic. Tools are grouped by what they do, not by how often you use them.
3.2 The Properties Palette
The Properties Palette on the left side of the screen is one of Revit’s most powerful features. When you select any element, the Properties Palette shows you everything about it. Wall type, height, phase, material, offset. You can edit almost everything about a placed element directly in this palette without going back to the tool.
3.3 The Project Browser
Think of the Project Browser as your project filing system. It organises all your views — floor plans, elevations, sections, 3D views, sheets, schedules and families. Double-click any item to open it. Learning to navigate the Project Browser efficiently saves enormous amounts of time on large projects.
3.4 View Controls and the ViewCube
At the bottom of every view is the View Control Bar. It lets you change visual style from wireframe to realistic, turn sun settings on or off, and control what elements are visible. The ViewCube in the top right corner of 3D views lets you orbit and navigate your model. Learn to use the scroll wheel for zoom, middle-mouse button for pan, and hold Shift + middle-mouse to orbit.
3.5 Keyboard Shortcuts Worth Learning First
| Shortcut | Function |
| WA | Wall tool |
| DR | Door tool |
| WN | Window tool |
| CM | Component (place family) |
| ZA | Zoom to fit all |
| VV | Visibility/Graphics Overrides |
| UN | Project Units |
| RP | Reference Plane |
⚠️ WARNING
Never use the scroll bar to zoom in Revit. The scroll wheel zooms toward your cursor position, making navigation much faster. Train this habit from day one or you will always be slow in the software.
Section 4: Essential Modeling Skills
This is where most beginners spend their first month. Building a model in Revit is not hard — but it is systematic. You need to learn each element type in the right order or your model will have problems that are very difficult to fix later.
4.1 Project Setup: The Step Nobody Talks About
Before you place a single wall, you need to set up your project correctly. Set your project units. Define your levels. Establish your grids. Choose your location for sun studies. These decisions affect everything that follows. Students who skip this step spend weeks debugging problems that would never have existed.
In Revit, levels control the height and floor-to-floor relationships of every element in your building. Grids give your structural and architectural elements a coordinate system. Set both before you model anything.
4.2 Walls, Floors and Roofs
The three main building elements for any architecture project. Walls in Revit are compound elements — they have multiple layers including finish, core, and insulation. Choosing the right wall type from the start saves you from editing hundreds of placed elements later.
Floors are sketch-based elements. You draw the boundary and Revit fills it. Roofs can be by footprint, extrusion or face. Most residential buildings use footprint roofs. More complex forms use face-based roofs combined with massing geometry.
4.3 Stairs and Railings
Stairs are one of the most complex elements to model correctly in Revit. Use the Stair by Component method for most projects. Define the run, landing and railing separately. Always check your riser count and tread depth against your local building code. In India, IS 875 governs stair dimensions. In Australia, the National Construction Code sets the rules.
4.4 Curtain Walls and Glazing Systems
Curtain walls are common in commercial architecture. In Revit, a curtain wall is a specialised wall type with a grid system of mullions and panels. Learning curtain walls moves you into intermediate Revit territory. Practice building a simple glazed facade before attempting a complex curtain wall system.
4.5 Massing for Conceptual Design
Revit’s Massing tools let you create conceptual building forms before committing to detailed modeling. You can apply floors, walls, and roofs to a mass. This is useful for early design exploration and gross area calculations. Many firms use a separate conceptual mass model before starting the detailed architecture model.
💡 CALLOUT
The Revit Skill Ladder: Level 1 — Walls, floors, roofs, doors, windows. Level 2 — Stairs, curtain walls, in-place families. Level 3 — Custom families, shared parameters, complex roofs. Level 4 — Worksharing, linked models, schedules, phasing. Level 5 — Dynamo, computational design, BIM management.
Section 5: Documentation Skills
One of Revit’s biggest advantages is that your drawings come directly from your model. Change the model and the drawings update automatically. But getting professional-quality drawings requires knowing how to set up your documentation correctly.
5.1 Creating Views and View Templates
Every floor plan, section, elevation and 3D view in Revit is a view of the same underlying model. You create views in the Project Browser. View Templates let you save and apply consistent settings like scale, detail level and visibility graphics across multiple views. Set up View Templates early in every project.
5.2 Annotation: Dimensions, Tags and Text
Dimensions in Revit are intelligent. They are connected to the elements they reference. Move a wall and the dimension updates. Use the Aligned Dimension tool for most annotation. Tags extract information from element properties automatically — a door tag reads the door type and mark number from the element. Text is used for notes and keynotes.
5.3 Sheets and Title Blocks
Sheets are where your views become drawings ready for printing or PDF export. A Sheet in Revit is equivalent to a drawing sheet in a drawing set. You drag views from the Project Browser onto sheets. The title block is a Revit Family that carries the project name, drawing number, revision and other standard information.
5.4 Schedules and Material Takeoffs
Schedules are one of Revit’s most powerful documentation features. A Room Schedule automatically counts every room in your project and lists its name, area, and finish. A Door Schedule lists every door type, dimensions and hardware. These schedules are always live — add a door to the model and it appears in the schedule instantly.
5.5 Printing and PDF Export
In Revit, you print from the Print dialog or use the Export to PDF function. Always use the batch print method for large drawing sets. Set up print settings as a named preset so you can reproduce the same output. Most firms use ‘raster processing’ mode for consistent PDF output, especially when the model contains lots of materials and textures.
✅ TIP
Save your View Templates and Sheet Setup as a Revit Template file (.rte). Build one template per project type — residential, commercial, interior. This saves hours of setup on every new project.
Section 6: Family Creation Basics
Revit Families are the custom components that make your model specific. A door, a window, a light fixture, a custom furniture piece — these are all Families. Knowing how to create and edit Families is what separates an intermediate Revit user from a beginner.
6.1 The Three Family Types
System Families are built into Revit and cannot be loaded from outside. Walls, floors, roofs and ceilings are system families. Their types are defined within the project. Loadable Families are external .rfa files you create in the Family Editor and load into any project. Component Families, curtain wall panels and structural framing are all loadable. In-Place Families are created within the project for unique one-off elements.
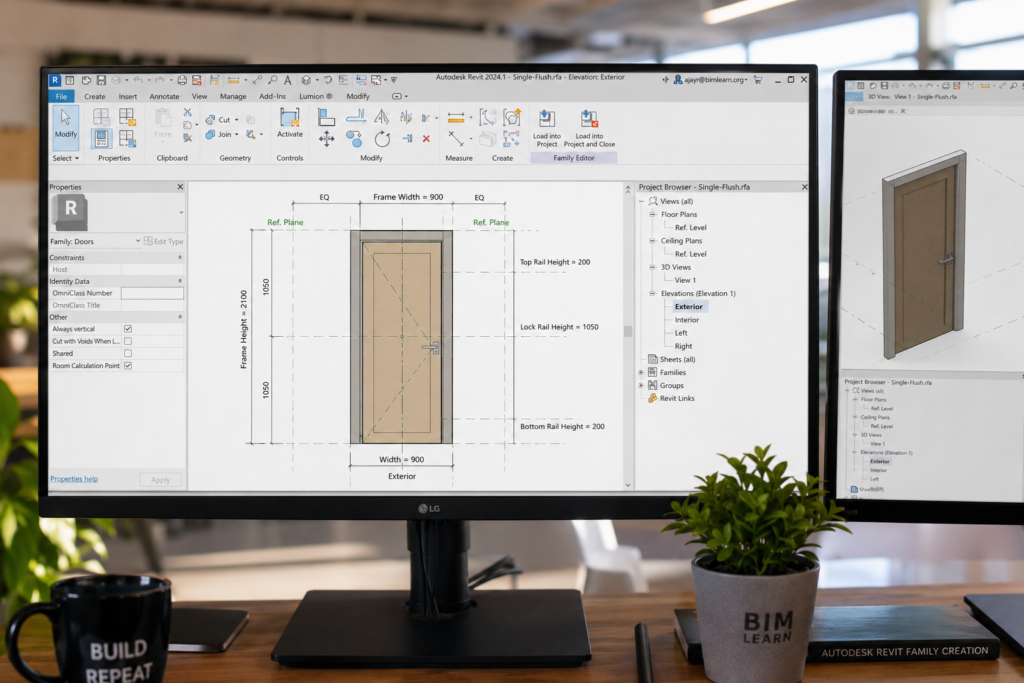
6.2 The Family Editor Environment
When you open the Family Editor, you enter a separate environment with its own ribbon and work plane. You start with a template that defines whether the family is wall-hosted, floor-hosted, ceiling-hosted or standalone. Choosing the wrong template at the start means rebuilding the family from scratch.
6.3 Reference Planes and Parameters
Reference planes are the skeleton of every family. They define the relationships between geometry and the parameters that control it. Parameters are the variables — width, height, depth, material. Strong families are built on well-named reference planes with properly locked geometry. When parameters are correct, you can type any dimension and the family updates instantly.
6.4 Building a Simple Door Family
A basic door family is a good first family project. Start with the Generic Door template. Set up reference planes for width and height. Create a simple rectangular extrusion for the panel. Add a void cut for the door opening. Define Width and Height as Instance parameters so each door in your project can have different dimensions. This single exercise teaches you 80% of what you need to know about families.
6.5 Shared Parameters and Scheduling
Shared Parameters are parameter definitions stored in an external text file that can be used across multiple families and projects. They are essential for creating schedules that include custom data. If you want a furniture schedule that includes manufacturer name and product code, shared parameters are how you make it work. They are also required for COBie data exports on BIM-mandated projects.
💡 CALLOUT
The ARCNET Revit Skill Ladder — Family Creation Level: Beginner: Edit existing system family types. Intermediate: Create simple loadable families with parameters. Advanced: Build complex adaptive families and nested families. Expert: Manage shared parameter libraries across a firm’s project portfolio.
Section 7: Collaboration Workflows
Architecture is a team sport. On real projects, multiple architects, engineers and consultants work on the same building simultaneously. Revit has a specific set of tools to make this possible. Understanding them is essential before you enter professional practice.
7.1 Worksharing: Working in the Same Model
Revit Worksharing allows multiple users to work in the same project file simultaneously. The process starts by enabling Worksharing in the Collaborate tab. This creates a Central Model stored on a shared server or in the cloud. Each team member works on a Local Copy — their own version of the file that they sync with the Central Model at regular intervals.
Worksets are the grouping system within a Workshared project. You can assign different elements to different Worksets — Architecture, Structure, MEP, Site. Each team member borrows elements, makes changes, and syncs back to the central model.
7.2 Revit Server and BIM 360
Revit Server is the on-premises solution for hosting Central Models across multiple office locations. Autodesk BIM 360 (now Autodesk Construction Cloud) is the cloud-based alternative. It stores your Central Model in the cloud, eliminating the need for a local server.
Many large firms in India use BIM 360 for projects that span multiple cities. In the Middle East, where projects often involve international design teams, cloud collaboration is now standard.
7.3 Linking Models from Other Disciplines
On most projects, you will receive Revit models from structural and MEP engineers. These are linked into your architectural model as reference models using Revit Links. Linked models are visible but cannot be directly edited. You can use Coordination Review to detect and log clashes between disciplines.
7.4 Clash Detection with Navisworks
Navisworks is Autodesk’s clash detection and project review platform. Once structural and MEP models are linked into Revit, the combined model is exported to Navisworks for comprehensive clash detection. Finding a duct passing through a beam on screen is far cheaper than discovering it on site. This is a core skill in professional BIM practice.
7.5 Collaboration Etiquette
In a Workshared project, your behaviour affects your entire team. Always sync with central before starting work and when finishing a session. Never borrow elements you are not actively working on. Release your borrows after each session. Name your Worksets and Local files clearly. These habits are professional expectations, not optional courtesies.
⚠️ WARNING
Never leave a Revit Central Model with borrowed elements at the end of the day. If you are hit by the bus scenario — unable to return — your colleagues cannot save their work until your borrows are released. This is one of the fastest ways to damage your professional reputation in a team.
Section 8: Portfolio Development
Your Revit skills are invisible until you show them. A strong BIM portfolio is proof of competence. It converts your learning hours into employment opportunities. This section tells you exactly what to include and how to present it.
8.1 The Three Projects Every BIM Portfolio Needs
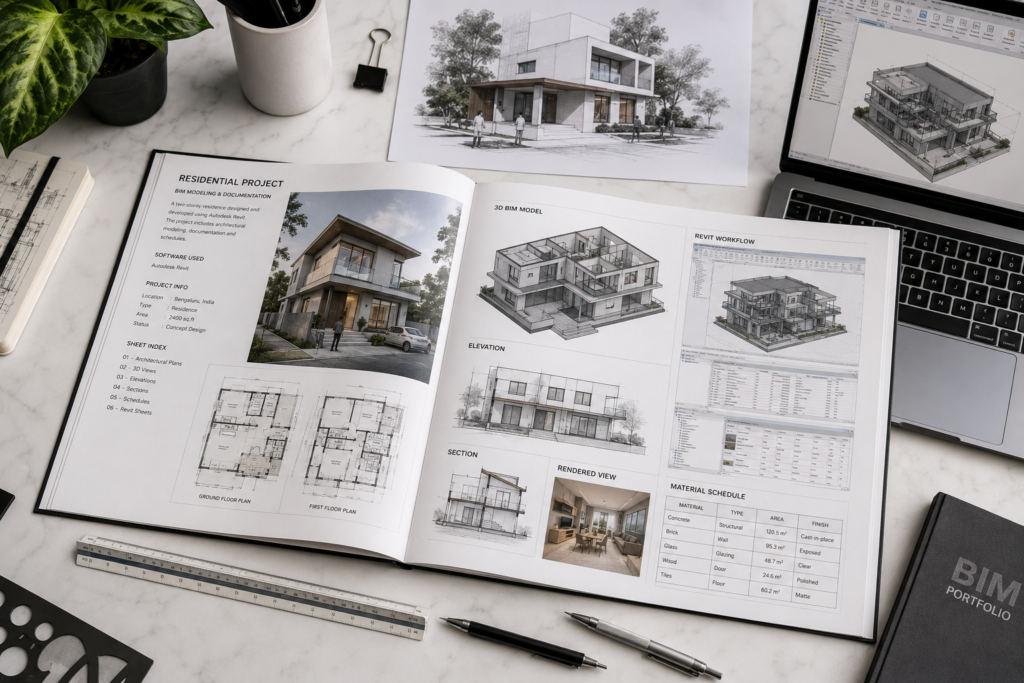
Project One: A residential building. This shows you can model domestic architecture — levels, rooms, standard wall and floor types, a complete drawing set including plans, sections, elevations and a 3D view. Target: a simple two-storey house.
Project Two: A small commercial building. A cafe, retail space or co-working environment. This demonstrates curtain walls, open floor plates, more complex documentation and basic interior fit-out.
Project Three: A family creation project. Create a collection of parametric families — a custom door, a window, a piece of furniture. Include screenshots from the Family Editor and rendered views in your portfolio. This proves your advanced technical understanding.
8.2 What Employers Actually Look For
Employers do not want to see 50 screenshots of random Revit models. They want to see evidence of a complete workflow. Model setup to documentation to presentation. They want to see that your drawings are clean, your schedules are accurate, and your model is organised correctly. One complete, well-executed project is worth more than five unfinished ones.
8.3 Rendering from Revit
You can render directly inside Revit using the built-in renderer or export to Enscape, Lumion or D5 Render for higher quality results. Most architecture firms use Enscape for live walkthroughs and quick renders. Learning the basics of Enscape alongside Revit is one of the highest-value side skills you can add to your portfolio.
8.4 BIM Progress Tracker — Portfolio Readiness Scorecard
| Skill Area | Portfolio-Ready When… |
| Project Setup | Units, levels, grids configured correctly before modeling |
| Modeling | Can build a complete two-storey residential model |
| Documentation | Complete drawing set with plans, sections, elevations, schedule |
| Families | Created at least one parametric loadable family with parameters |
| Collaboration | Understands Worksharing and has practiced on a team project |
| Rendering | Has at least one high-quality render in portfolio |
| Presentation | PDF portfolio is clean, organized and shows full workflow |
✅ TIP
Export your final portfolio as a PDF optimised for screen — not print. Most job applications are reviewed on screen. Use PDF Compress tools to keep the file under 10MB. Name it: FirstName_LastName_BIM_Portfolio_2025.pdf
Section 9: Common Beginner Mistakes
Most Revit beginners make the same set of mistakes. Knowing them in advance saves you weeks of frustration, corrupt files and missed deadlines. These are the most common problems seen in student work globally.
9.1 Not Setting Up the Project Before Modeling
This is the most common and most damaging mistake. Students open a new Revit file and immediately start placing walls. Within a week, they discover their units are wrong, their levels are not set up, and their walls are floating in space. The fix requires deleting and rebuilding large parts of the model.
Rule: spend 30 minutes on project setup before placing a single element. Set your units, define your levels, place your grids, and set your location. This 30 minutes saves 10 hours of rework.
9.2 Using Generic Wall Types for Everything
Revit ships with a long list of wall types. Many beginners use Generic 200mm for every wall in their building — internal partitions, external walls, retaining walls, everything. This destroys the accuracy of your schedules, area calculations and cost estimates. Always assign the correct wall type from the start.
9.3 Ignoring the Warnings Dialogue
Revit shows warnings for model errors — overlapping walls, unjoined elements, elements not in correct phase. Many beginners click ‘OK’ and ignore them. This builds up a warning backlog that eventually causes performance problems and model corruption. Address warnings when they appear.
9.4 Not Using View Templates
Students often manually adjust the visibility of every element in every view. Without View Templates, changing your graphic standard means editing every view one by one. This takes hours on a large project. Set up View Templates in Week 1 and apply them consistently.
9.5 Overloading the Model with Unnecessary Detail
A common mistake is importing highly detailed furniture families or ultra-complex downloaded families from the internet into your model. A photorealistic sofa with 2 million polygons will make Revit incredibly slow. Keep your model lean. Use placeholder families for furniture in schematic design and upgrade to detailed families only for presentation views.
⚠️ WARNING
Never open a downloaded family without checking its file size first. Families over 5MB are almost always over-detailed and will slow your model significantly. Good Revit families are rarely more than 500KB to 2MB.
Section 10: Building Your BIM Career
Revit is the starting point, not the destination. The BIM landscape is expanding rapidly, with new roles, new tools and new specialisations emerging every year. This section maps your career path beyond the basics.
10.1 The BIM Career Ladder
| Role | What You Need |
| BIM Technician / Drafter | Strong Revit modeling and documentation skills. Entry level. |
| BIM Coordinator | Revit + Navisworks, clash detection, team coordination. 2-3 years. |
| BIM Manager | Multi-discipline BIM workflows, standards management, firm-wide systems. 5+ years. |
| VDC (Virtual Design & Construction) Manager | BIM + scheduling + 4D/5D simulation. Construction focus. 5-8 years. |
| Computational Designer | Revit + Dynamo + Grasshopper + Python. Specialised career path. |
10.2 Certifications Worth Pursuing
The Autodesk Certified Professional (ACP) in Revit Architecture is the most widely recognised formal credential. It is available in India through authorised Autodesk testing centres in major cities. The BRE Academy offers BIM Level 2 certificates recognised in the UK market. buildingSMART offers IFC and openBIM credentials for those interested in international standards.
10.3 Tools to Learn Alongside Revit
Navisworks for clash detection and project review. Dynamo for computational design automation within Revit. Enscape or Lumion for real-time rendering. AutoCAD for firms that still use hybrid workflows. Power BI connected to Revit data for project reporting and cost tracking.
10.4 The Global BIM Job Market
BIM skills are in demand across all major architecture markets. In India, firms in Mumbai, Bengaluru, Hyderabad and Chennai are actively hiring BIM-competent graduates. In the UAE and Saudi Arabia, megaprojects like NEOM, Expo City and Abu Dhabi’s urban expansion are creating sustained demand. In Australia and the UK, BIM is embedded in infrastructure delivery and building construction.
Remote BIM work is also growing. Indian BIM professionals are increasingly employed by UK, Australian and US firms on project outsourcing arrangements. Strong Revit skills combined with communication skills open international opportunities.
10.5 Revit Learning Timeline — 12-Week Overview
| Week | Focus Area | ||
| Week 1-2 | Interface navigation, project setup, levels, grids, basic walls | ||
| Week 3-4 | Floors, roofs, doors, windows, curtain walls, basic 3D navigation | ||
| Week 5-6 | Stairs, railings, rooms, areas, basic annotation and dimensions | ||
| Week 7-8 | Views, sheets, title blocks, complete drawing set documentation | ||
| Week 9-10 | Family Editor basics, first parametric family, shared parameters | ||
| Week 11-12 | Worksharing practice, portfolio project, rendering, PDF export | ||
30-Day Action Plan
Use this plan as your first month in Revit. Do not skip ahead. Each week builds on the last.
| Week | Daily Actions |
| Week 1 — Learn the Interface | Day 1: Install Revit student version. Day 2: Complete Autodesk’s free ‘Revit Essentials’ tutorial. Day 3-4: Explore every ribbon tab. Day 5: Set up your first project (units, levels, grids). Day 6-7: Practice navigating your 3D view and Project Browser. |
| Week 2 — Build Simple Models | Day 8-9: Place walls and define a floor plan. Day 10: Add doors and windows. Day 11: Create a floor slab. Day 12: Add a simple roof. Day 13-14: Complete your first full two-storey residential shell model. |
| Week 3 — Create Documentation | Day 15-16: Set up floor plan, section and elevation views. Day 17: Apply View Templates to all views. Day 18: Add dimensions and tags. Day 19: Create a room schedule. Day 20-21: Set up a drawing sheet with title block and arrange your views. |
| Week 4 — Build Mini Projects | Day 22-23: Start a small commercial building model (cafe or co-working). Day 24-25: Create your first simple Revit family. Day 26-27: Export a complete drawing set as PDF. Day 28-30: Assemble your first mini-portfolio PDF and share with a peer for feedback. |

Frequently Asked Questions
Q1: How long does it take to learn Revit?
With structured daily practice of 1-2 hours, most beginners reach job-ready proficiency in 12 weeks. This means you can model, document and present a complete building project. Mastery — including families, collaboration and automation — takes 12-18 months of professional practice.
Q2: Can I learn Revit for free?
Yes. Autodesk offers a free 3-year student license of Revit through the Autodesk Education Community. Sign up with your university email. This gives you full access to the professional software. Autodesk also offers free tutorials through its website and YouTube channel.
Q3: Is Revit hard to learn?
The interface is complex at first. Most students feel lost for the first two weeks. This is normal. The difficulty is not the software itself but the underlying BIM logic. Once you understand how Revit thinks about buildings — as a database of intelligent elements — the interface begins to make sense.
Q4: Do I need a powerful computer to run Revit?
Revit is resource-intensive. The minimum requirement is an Intel i7 or AMD Ryzen 7 processor, 16GB RAM and a dedicated graphics card. For student projects, 16GB RAM is usually sufficient. For large commercial projects in professional practice, 32GB or more is recommended. Revit runs on Windows only — macOS requires a virtual machine.
Q5: Should I learn AutoCAD before Revit?
Not necessarily. AutoCAD teaches you to draw in 2D, which is a useful skill but a different skill. Revit requires a completely different way of thinking. If you are starting fresh, learning Revit first is a valid choice. However, most architecture offices still use AutoCAD for some tasks, so knowing both is advantageous.
Q6: Is Revit relevant in India?
Very much so. India’s largest architecture and engineering firms — including NBBJ India, Gensler, HOK, Arcop and local firms like RSP, Kapadia Associates and 3D Architects — all use Revit. Government infrastructure projects, real estate developers and international project exports are all driving Revit adoption across India.
Q7: What is Dynamo and should I learn it?
Dynamo is a visual programming tool that works inside Revit. It allows you to automate repetitive tasks, generate geometry algorithmically and connect Revit data to external databases. You do not need Dynamo as a beginner. Once you are comfortable with advanced Revit workflows — typically after 6-12 months — learning Dynamo is a strong career differentiator.
Q8: How do I build a Revit portfolio with no professional experience?
Build your own projects. A portfolio of three well-executed personal projects — a residential building, a small commercial building and a family creation project — is entirely acceptable for entry-level positions. Use real-world briefs as inspiration: design a cafe for a specific site in your city, then build and document it in Revit as if it were a real commission.
Key Takeaways
Revit is a BIM platform, not a drawing tool — understanding this distinction changes how you learn it.
You can reach job-ready Revit proficiency in 12 focused weeks with the right structure.
BIM fundamentals are more transferable than software skills — learn the concepts, not just the clicks.
A strong Revit portfolio with 3 real projects is more valuable than 100 YouTube hours.
The most common beginner mistake is skipping project setup — it causes problems throughout the entire model.
Revit Families are the key to moving from beginner to intermediate level.
Collaboration skills using Worksharing and Revit Server are expected in professional practice globally.
The BIM career path leads to roles in BIM Management, VDC, Computational Design and Project Management.
Start Your BIM Journey Today
Download the free 12-Week Revit Learning Plan and follow a structured path from complete beginner to portfolio-ready BIM professional.
Continue Exploring
| 🤖 AI Tools Every Architect Should Know Discover how AI is changing architectural design, documentation and project delivery globally. | 🔭 Future Skills Architects Need by 2035 A research-backed guide to the competencies that will define the next generation of architecture professionals. | 📂 Coming Soon-Building Your First Revit Portfolio Step-by-step guide to selecting, presenting and submitting a BIM portfolio that gets you shortlisted. |
| 🐞 Coming Soon-Common Revit Mistakes Beginners Make The 15 most common errors that derail student Revit projects and exactly how to avoid them. | 🎯 Coming Soon- Revit Skills Advanced Skills If you only have two weeks, here are the specific skills that will have the highest immediate impact. | 📊 Coming Soon – BIM Career Paths in India and Asia A regional job market analysis of BIM roles, salaries and growth opportunities across Asia’s fastest-growing architecture markets. |