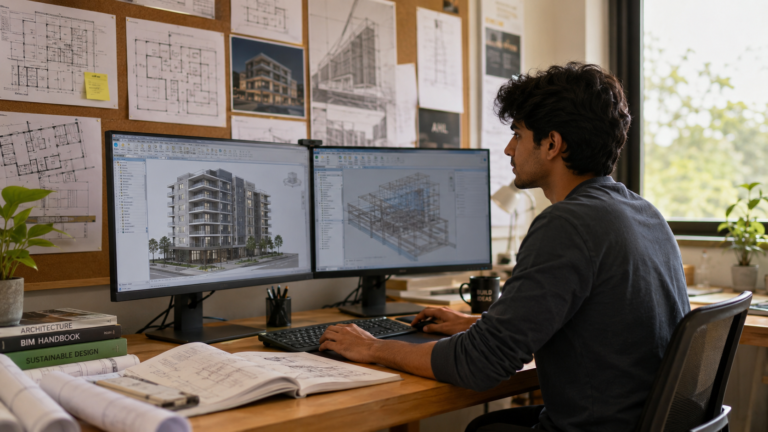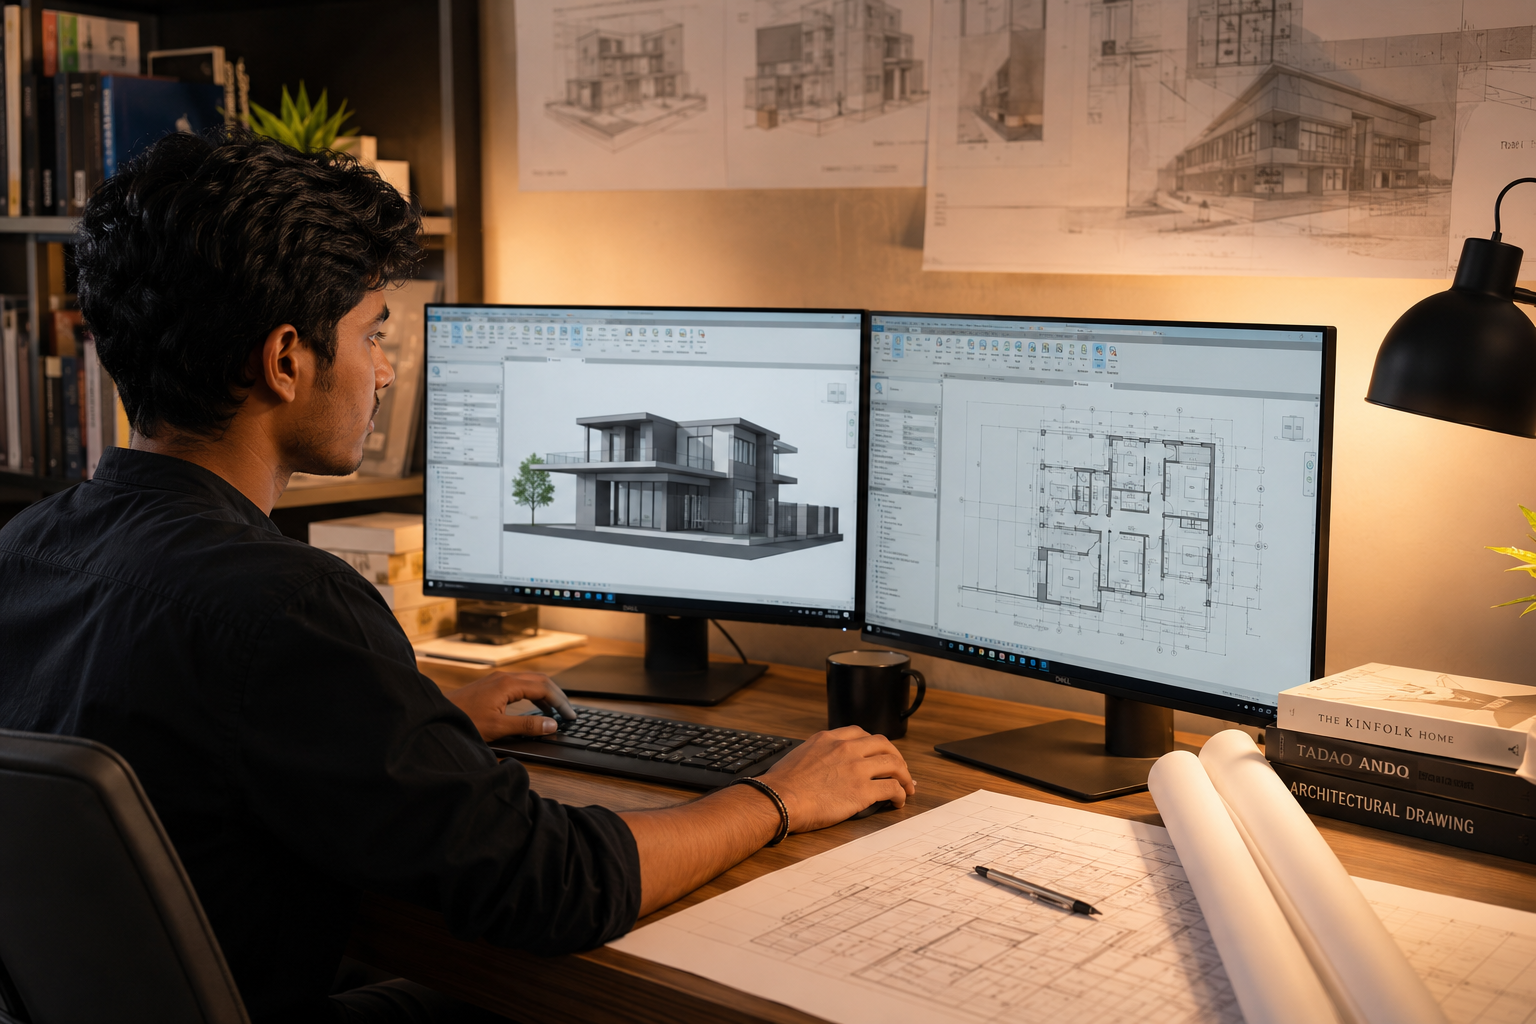
Revit Skills Beginners Should Learn First
A Practical BIM Learning Roadmap
Why This Matters
Most architecture students and young professionals start Revit the wrong way. They open the software, get lost in the ribbon, and spend hours clicking through menus before drawing a single wall. The result is frustration, wasted time, and a belief that BIM is too complex to master quickly.
It does not have to be that way.
Revit is now the global standard for architectural documentation. Firms in India, Singapore, the UAE, the UK, and Australia increasingly require Revit proficiency from day one. Learning the right skills in the right order means you can contribute to real projects faster, build a stronger portfolio, and compete confidently in the job market.
This guide removes the guesswork. It gives you a clear, sequenced learning path — from navigating the interface to producing a complete drawing set — so you know exactly what to learn, in what order, and why it matters.
Who Is This Guide For?
🎓
Architecture Students
You have heard of BIM but never opened Revit. This guide gives you a structured starting point so you can build usable skills before your first internship.
🏗️
Recent Graduates
You have a degree but your firm expects Revit proficiency now. This roadmap gets you productive in 12 weeks without expensive training courses.
✏️
AutoCAD Users Switching to BIM
You know how to draw but not how to model. This guide bridges the gap between 2D drafting habits and 3D parametric thinking.
🏠
Self-Building Homeowners
You want to understand what your architect is producing and perhaps model your own home. This guide explains the core tools in plain language.
Quick Navigation
| 01 The Revit Interface Section 1 — Learn the panels, browser, and view controls before touching a single wall. | 02 Core Modelling Skills Section 2 — Walls, doors, windows, floors, and roofs explained from scratch. |
| 03 Views and Documentation Section 3 — Turn your model into professional floor plans, sections, and elevations. | 04 Annotation and Schedules Section 4 — Add dimensions, tags, and automated schedules linked to your model. |
| 05 Sheets and Printing Section 5 — Assemble drawing sheets with a title block and export to PDF or DWG. | 06 Portfolio and Next Steps Section 6 — Use your first project to build a portfolio and plan your BIM career path. |
1. The Revit Interface: Your Starting Point
Every hour you spend learning the Revit interface properly saves you ten hours of confusion later. Most beginners skip this step and pay for it every time they need to find a tool, change a setting, or troubleshoot a problem. Spend your first two days here and you will move through every other skill faster.
1.1 The Ribbon and Tabs
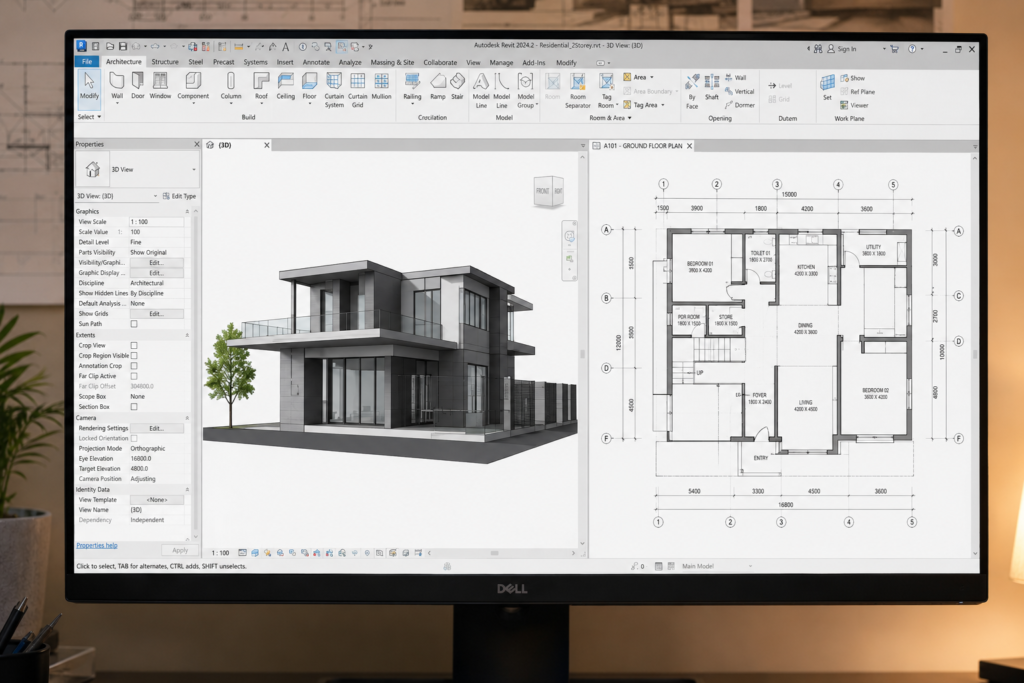
The ribbon sits at the top of the screen and organises every tool into logical tabs: Architecture, Structure, Systems, Insert, Annotate, View, Manage. For beginners, you will spend most of your time in the Architecture and Annotate tabs.
Each tab is divided into panels — Walls, Build, Datum, Room & Area. Learn what lives in each panel rather than memorising toolbar positions. The ribbon adapts when you select elements, so context-sensitive tools appear automatically.
✅ TIP
Use keyboard shortcuts from day one. WA = Wall, DR = Door, WN = Window, GR = Grid. Press ‘KS’ at any time to open the full shortcut list. Muscle memory with shortcuts can cut your modelling time by 30%.
1.2 The Project Browser
The Project Browser on the left panel is the backbone of every Revit project. It organises your project into Views, Legends, Schedules, Sheets, and Families. Think of it as a filing cabinet for everything your model contains.
Double-clicking any view in the browser opens it. Right-clicking gives you options to duplicate, rename, or apply view templates. Keep your browser tidy from the start — architects in firms like B+I Studio in Singapore or Zaha Hadid Architects in London use strict naming conventions that prevent costly confusion on large projects.
1.3 Properties Panel and Type Selector
The Properties panel on the left shows the parameters of whatever element you have selected. This is where you change wall height, floor thickness, or room names. At the top is the Type Selector — a dropdown that lets you switch between different types of the same element.
For example, select a wall and the Type Selector shows ‘Basic Wall: Generic 200mm’. Click it to switch to a different wall type without remodelling. Understanding the difference between Instance Properties (this single element) and Type Properties (every element of this type) is one of the most important concepts in BIM.
📌 CALLOUT
In BIM, changing a Type Property affects every single element of that type across the entire project. Always click ‘Duplicate’ before editing type properties to avoid unintended changes to the model.
1.4 View Controls and Navigation
The View Control Bar at the bottom of each view manages scale, detail level, visual style, and temporary hide settings. The scale controls how the view prints — 1:100 for floor plans, 1:50 for details, 1:200 for site plans.
Navigate with the scroll wheel to zoom, middle-button drag to pan, and Shift + middle-button to orbit in 3D. The ViewCube in the top-right corner of 3D views lets you snap to standard viewpoints. Press ZA (Zoom All) or ZF (Zoom to Fit) when you lose your view — every beginner needs this at least once an hour.
2. Core Modelling Skills: Building the Digital Model
This is where Revit stops being theory and starts being architecture. Core modelling covers the elements that make up the physical building: walls, floors, roofs, ceilings, doors, and windows. Master these and you can model any residential building in the world.
2.1 Walls, Doors and Windows
Walls are the foundation of every Revit model. Draw them using the Wall tool (WA), then click two points to define the wall path. Revit connects walls automatically at corners, saving the manual cleanup that AutoCAD requires.
Place doors (DR) and windows (WN) directly onto walls — Revit cuts the opening automatically. Change the sill height, head height, and type in the Properties panel. For Indian residential projects, a typical exterior wall is 230mm brick; in the UK, a standard cavity wall is 300mm. Use the correct type from the start to keep your documentation accurate.
⚠️ WARNING
Never draw walls at arbitrary lengths without checking your project units. Go to Manage > Project Units before starting any model and set length to millimetres (India, UK, Australia) or feet and inches (North America). Wrong units create errors that are difficult to fix later.
2.2 Floors and Slabs
Use the Floor tool under Architecture > Floor. Revit asks you to sketch a boundary — click around the perimeter of the room, then click the green tick to complete. The floor slab appears at the current level.
Set the floor thickness and material in Type Properties. A ground floor slab in a hot-dry climate like Rajasthan might use 150mm RCC; a raised timber floor in temperate Melbourne uses a different build-up entirely. Revit allows you to layer different materials in one floor type — concrete, insulation, screed, finish — so your documentation reflects real construction.
2.3 Roofs
Roofs can be modelled by footprint (flat or simple pitched) or by extrusion (complex profiles). For beginners, start with Roof by Footprint. Sketch the perimeter like a floor, set the overhang distance, enable ‘Defines Slope’ on the edges you want to pitch, and enter the rise-to-run ratio.
A 30-degree pitch common in South Asian bungalows translates to a slope of approximately 0.577:12. A flat roof in Dubai needs a minimum 1-degree fall for drainage — set this using the slope arrow tool within the roof boundary.
📌 CALLOUT
Revit roofs, floors, and ceilings are all sketch-based elements. You enter a ‘sketch mode’ to draw their boundary, then exit to generate the element. If your element does not appear after clicking the tick, check that your sketch boundary is a single closed loop with no gaps or overlaps.
2.4 Levels and the 3D Model Relationship
Levels are horizontal reference planes that define every floor of your building. Every element in Revit is attached to a level — walls, floors, roofs, ceilings. Manage your levels in any elevation view by dragging the level heads or using the Level tool.
A standard residential project has Ground Floor at 0mm, First Floor at 3000mm, and Roof Level at 6000mm. Change a level height and every attached element adjusts automatically. This is the core logic of parametric BIM — change one value and the entire model updates. Architects at firms like Studio Mumbai or Snøhetta use this to test multiple design options rapidly.
3. Views and Documentation: From Model to Drawing
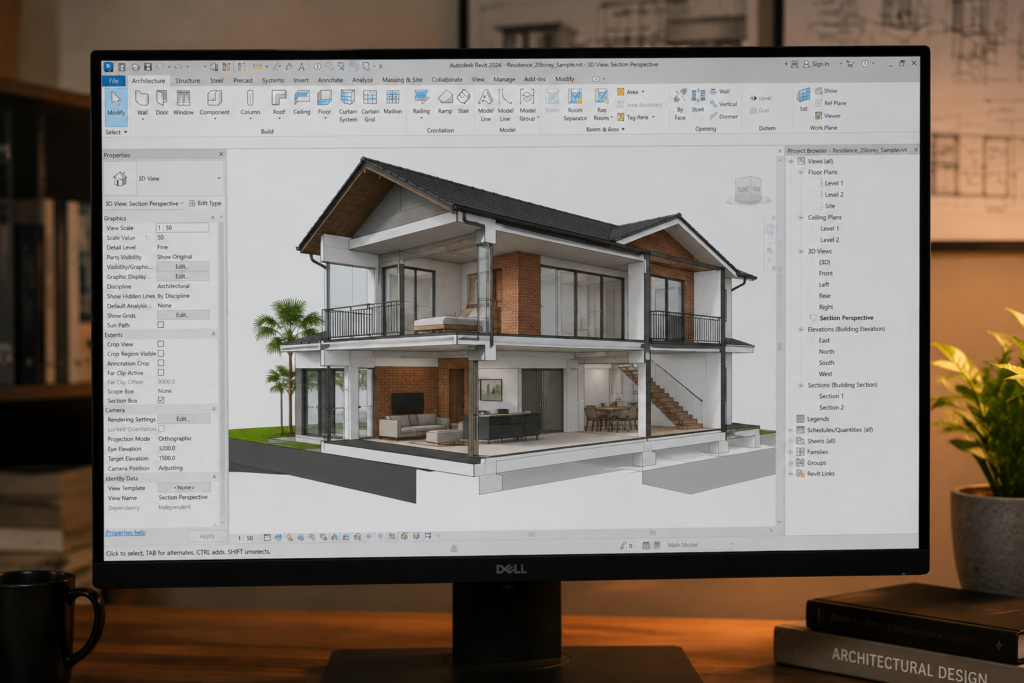
A Revit model only becomes useful architecture when it produces clear, accurate drawings. Views are not just pictures of your model — they are intelligent, live slices through a 3D database. Every change to the model instantly updates every related view. This is the core value of BIM over CAD.
3.1 Floor Plans and Reflected Ceiling Plans
Floor plans in Revit are created automatically when you set up levels. Open the project browser and find Views > Floor Plans — your Ground Floor and Level 1 plans are already there.
The cut plane controls what the plan shows. The default cut height is 1200mm above the level, which cuts through most windows. Adjust this in View Properties > View Range if your building has high sill windows or mezzanines. A reflected ceiling plan (RCP) looks upward from the cut plane — use it to show ceiling grids, light fittings, and AC diffusers in commercial projects.
✅ TIP
Create a View Template for each drawing type — floor plan, section, elevation — once you have set the correct visibility settings, line weights, and detail level. Apply the template to new views instantly. This is how architectural firms like Gensler or HCP Design produce consistent drawings across 200-person teams.
3.2 Sections and Elevations
Draw a section line anywhere in a floor plan using the Section tool (Architecture > Section). Revit creates a live section view that updates whenever the model changes. Place the section head carefully — avoid cutting through columns or walls you do not want to show.
Elevations are created from the four default elevation markers in your floor plan. Move the markers to position the elevation view, then open the view from the browser. For a residential project in Chennai, your south elevation will show the dominant facade — make sure your wall types, window heights, and roof profile read clearly at 1:100 scale.
3.3 3D Views and Perspective Views
Use the default {3D} view for coordination and design review. Create additional named 3D views for specific areas — ‘Living Room 3D’, ‘Staircase 3D’ — so you can return to them without reorienting the camera.
Perspective views (Camera tool) produce architectural renderings from within Revit. Place the camera in the floor plan, set the eye height and target, and Revit generates a perspective. Export this view for quick client presentations without needing a separate rendering application.
⚠️ WARNING
Never use the default {3D} view for your drawing sheets. Always create and name separate 3D views for specific purposes. The default 3D view resets when another team member opens it in a worksharing environment, destroying your carefully composed angle.
3.4 View Discipline and Visibility Graphics
Every view has a Visibility/Graphics (VG) override panel. This controls which categories — walls, floors, furniture, MEP — appear in each view. A structural engineer’s plan shows columns and beams but hides furniture. An interior designer’s plan hides structural elements but shows millwork.
Right-click any element and choose ‘Hide in View’ for quick adjustments. Use ‘Override Graphics in View’ to change the colour or line weight of specific elements in one view without affecting the rest of the project.
4. Annotation and Schedules: The Language of Construction
A beautifully modelled building is worthless if the drawings cannot be read on site. Annotation is the professional layer that communicates your design to builders, contractors, and approval authorities. Schedules turn your model data into organised tables — automatically.
4.1 Dimensions and Levels
Use the Aligned Dimension tool (DI) to place running dimension strings along walls. Click the first reference, click each subsequent reference, then click away from the elements to place the string. Revit snaps to wall faces, centre lines, and grid lines.
Keep dimension strings organised — one string for overall dimensions, one for opening locations, one for wall offsets. In Indian construction documentation, overall plan dimensions are placed outside the building outline; opening dimensions are typically shown inside. Check your local authority’s drawing requirements before finalising your sheet.
📌 CALLOUT
Dimensions in Revit are parametric — they are live links to the model geometry. If you move a wall, the dimension updates. But if you manually type a dimension value to override it, Revit disconnects that dimension from the model. Use ‘EQ’ constraints instead of manual overrides to keep your model and drawings synchronised.
4.2 Room Tags and Room Schedules
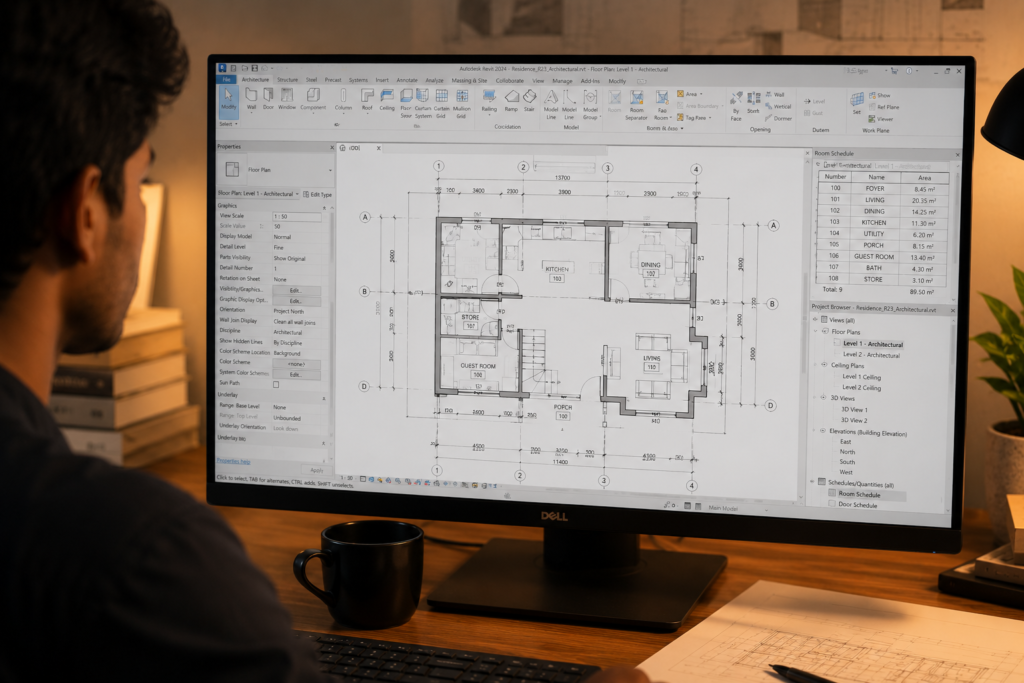
Place rooms using Architecture > Room (RM). Click inside any enclosed area and Revit calculates the room area automatically. The room name and number appear as a tag. Change the room name in the Properties panel — ‘Living Room’, ‘Bedroom 1’, ‘Kitchen’.
Create a room schedule under View > Schedules > Schedule/Quantities. Choose ‘Rooms’, then select the fields you want: Name, Area, Perimeter, Volume. The schedule appears in your project browser and updates automatically when you change the model. For a residential project in Mumbai, a typical room schedule includes area in square metres alongside each room name for RERA compliance documentation.
4.3 Door and Window Schedules
Door and window schedules are tables that list every opening in your project with its type, size, material, and hardware. Create them the same way as room schedules — View > Schedules > Schedule/Quantities, then choose ‘Doors’ or ‘Windows’.
Add fields for Mark (door number), Width, Height, Frame Material, and Fire Rating. These schedules are required by most authorities for building permit submissions. Revit generates them from the model data automatically — every door you place appears as a row in the schedule without manual data entry.
4.4 Text Notes and Keynotes
Use the Text tool (TX) for general notes on drawings — material specifications, construction notes, drawing titles. Keep text size consistent: 2.5mm for body notes, 3.5mm for headings, 5mm for drawing titles at 1:100 scale.
Keynotes are a more advanced system that links text notes to a project-wide keynote database — common in large commercial practices in the UK and Australia. For beginners, focus on mastering text notes first, then explore keynotes when you join a practice that uses them.
✅ TIP
Set up your text styles in a project template before starting documentation. Use a consistent font — Revit’s default Arial is readable, professional, and universally compatible. Create three text types: ‘Notes 2.5mm’, ‘Heading 3.5mm’, ‘Title 5mm’. Apply them consistently across every project.
5. Sheets and Printing: Delivering Professional Output
Your model is done. Your drawings are annotated. Now you need to deliver them. Sheets are the page layouts that hold your drawing views, title blocks, and revision records. They are what clients, contractors, and authorities receive — so they must be correct, consistent, and professional.
5.1 Creating Sheets and Title Blocks
Create a sheet under View > Sheet Composition > Sheet. Choose your title block — A1, A2, A3. Title blocks in Revit are families that carry project information: project name, address, architect’s name, drawing number, revision history.
Fill in the title block parameters in the Properties panel. The project name and number appear on every sheet automatically once entered. For a practice in Bangalore submitting to the BBMP, your title block must include the architect’s registration number from the Council of Architecture — build this into your title block family from the start.
📌 CALLOUT
Every architecture firm has a standard title block family. When you join a firm, never create a new title block from scratch — always use the firm’s standard. Title blocks contain legal information, logos, and formatting that comply with authority requirements and client contracts. Ask for the template on your first day.
5.2 Placing Views on Sheets
Drag any view from the project browser onto a sheet. Revit places the view with a viewport border. Activate the viewport by double-clicking to adjust the view position within the crop region. Lock the viewport position using the padlock icon once you are satisfied.
Scale views correctly before placing them. A floor plan of a 200m² house reads best at 1:100 on an A1 sheet. A bathroom detail needs 1:20 or 1:10 to show tiling and fixture dimensions clearly. Match your sheet layout to the drawing set conventions used in your region.
5.3 Revision Tracking
Revit has a built-in revision system under View > Sheet Composition > Revisions. Create revision entries with date, description, and revision number. Apply revisions to specific clouds drawn on individual sheets. The revision table in the title block updates automatically.
For Indian authority submissions, a common revision sequence is P1 (Preliminary), P2, then A (Approved) once the permit is issued. In the UK, revisions follow a numeric sequence under the BS 1192 naming convention. Match your revision system to the project context from the start.
✅ TIP
Before printing, audit your drawing set using the Sheet List schedule. Create it under View > Schedules and include Sheet Number, Sheet Name, and Drawn By. This becomes your transmittal record and confirms every drawing is accounted for before submission.
5.4 Export to PDF and DWG
Export sheets to PDF using File > Export > PDF. Select ‘Current Sheet’, ‘All Sheets’, or a selection set. PDF exports are for client presentation, authority submission, and contractor tender packages.
Export to DWG (File > Export > CAD Formats > DWG) for consultants who work in AutoCAD — structural engineers, MEP engineers, and surveyors. Choose the correct DWG version and confirm your export settings with the consultant. Many Indian structural engineers still work in AutoCAD 2010-2014 — export to that format to avoid compatibility issues.
6. Portfolio and Next Steps: Building Your BIM Career
Skills without evidence are invisible. Your first Revit project is more than a learning exercise — it is the foundation of your professional portfolio. Firms hiring junior architects and BIM technicians look for demonstrated competence, not just software knowledge on a résumé.
6.1 Portfolio Building Framework
Document your first project in three ways. First, the model file itself — organised, clean, and submitted with a meaningful file name (Project_RevitName_YYYYMMDD.rvt). Second, a PDF drawing set — at minimum a floor plan, section, elevation, and room schedule on correctly formatted sheets. Third, a short project summary page showing what skills you applied.
Residential projects are the best starting point because they are familiar, manageable in scale, and directly relevant to the largest segment of architectural work in India and Southeast Asia. Model a real house if you can — your own home, a relative’s house, or a publicly available floor plan.
✅ TIP
Export a Revit walkthrough video (3D View > Export > Walkthrough) and add it to your portfolio as a short MP4 clip. Even a 20-second walkthrough through a simple model shows clients and employers that you understand 3D space and BIM workflow — far more convincing than a static screenshot.
6.2 BIM Skill Matrix
Use the matrix below to honestly assess where you are and where you need to go. Beginner competence covers modelling and basic documentation. Intermediate involves families, worksets, and custom parameters. Advanced means Dynamo scripting, cloud collaboration on BIM 360, and IFC interoperability.
| Skill Area | Beginner | Intermediate | Advanced |
| Modelling | Walls, doors, windows | Families, massing, phasing | Complex geometry, linked models |
| Documentation | Floor plans, sections | Detail views, legends | Full drawing sets, specifications |
| Schedules | Room & door schedules | Custom parameters, formulas | Linked data, COBie export |
| Collaboration | Local save, central file open | Worksets, sync to central | BIM 360/ACC cloud collaboration |
| Families | Place system families | Edit existing families | Build parametric families from scratch |
| Interoperability | Export to PDF/DWG | IFC export, Navisworks NWC | Revit ↔ Rhino/Dynamo workflows |
6.3 12-Week Learning Roadmap
Follow this structured roadmap to build Revit skills systematically. Each two-week block builds on the last. Do not skip ahead — the skills are cumulative. Complete the milestone at the end of each block before moving to the next.
| Week | Focus Area | Key Skills | Milestone |
| 1-2 | Interface & Navigation | Ribbon, project browser, view controls, basic navigation | Open & navigate a sample Revit project without confusion |
| 3-4 | Walls, Doors & Windows | Place walls, insert doors/windows, edit type properties | Draw a simple one-room floor plan from scratch |
| 5-6 | Floors, Roofs & Ceilings | Floor slabs, pitched roofs, ceiling grids, level management | Complete a single-storey residential model |
| 7-8 | Documentation Basics | Floor plan views, sections, elevations, callouts | Generate a set of 4 basic drawings from your model |
| 9-10 | Annotations & Schedules | Dimensions, tags, room schedules, door/window schedules | Produce an annotated drawing sheet ready for review |
| 11-12 | Sheets & Printing | Title blocks, sheet assembly, print/export to PDF & DWG | Deliver a complete beginner portfolio project package |
⚠️ WARNING
Avoid watching Revit YouTube tutorials passively. Active modelling is the only way to build real skill. Watch a 5-minute tutorial, then close the video and replicate what you saw from memory. If you cannot reproduce it, re-watch once. Learning through doing builds retention that passive viewing cannot.
6.4 Continuing Education and Certification
Autodesk offers the Autodesk Certified Professional (ACP) exam in Revit Architecture. Passing this exam demonstrates professional-level competence to employers worldwide. Study using the ACP exam guide, practice with Autodesk’s sample files, and take the exam within six months of completing this roadmap.
In India, the Bureau of Indian Standards (BIS) has adopted ISO 19650 for BIM on government projects — understanding this standard opens doors to public sector work. In Singapore, BCA (Building and Construction Authority) mandates BIM for all projects above a certain scale. International awareness of BIM standards positions you well beyond your local market.

30-Day Action Plan
This plan assumes one to two hours of focused Revit practice per day. Consistent daily practice outperforms marathon weekend sessions every time. Follow the sequence and complete each output before moving forward.
| Day | Theme | Activity | Output |
| 1-3 | Setup | Install Revit, explore interface, project browser | Comfortable with navigation |
| 4-7 | First Model | Draw walls, add doors/windows, place floor | Simple room floor plan |
| 8-12 | Vertical | Add roof, ceiling, set levels | Full 3D single-storey shell |
| 13-16 | Views | Floor plan, section, elevation, callout | 4 drawing views from model |
| 17-20 | Annotation | Dimensions, room tags, door/window tags | Fully annotated floor plan |
| 21-24 | Schedules | Room schedule, door schedule, window schedule | 3 schedules linked to model |
| 25-27 | Sheets | Title block, place views, sheet numbering | Sheet set ready to print |
| 28-30 | Export & Share | Export PDF + DWG, review output, document lessons | Beginner portfolio project |
Frequently Asked Questions
Q1: How long does it realistically take to learn Revit as a complete beginner?
Most architecture students reach a productive beginner level in 8-12 weeks of consistent daily practice. ‘Productive’ means you can model a simple residential building, produce a basic drawing set, and navigate a project file without getting lost. Intermediate proficiency — including families, worksets, and schedules — typically takes 6-12 months of regular use on real projects.
Q2: Do I need an expensive computer to run Revit?
Revit is demanding software. For beginner projects (single-storey residential), a modern laptop with 16GB RAM, a dedicated graphics card (NVIDIA GTX 1060 or equivalent), and an SSD will work adequately. Large commercial projects require workstations with 32-64GB RAM. Autodesk publishes official hardware recommendations for each Revit version — check these before purchasing hardware.
Q3: Is Revit skills knowledge transferable between countries and practices?
Yes. Revit is a global standard used by firms across India, Singapore, the UAE, Australia, the UK, and North America. The core software skills transfer directly. What varies between countries are drawing standards (IS, BS, AS, ASTM), title block conventions, authority submission requirements, and BIM protocol standards (ISO 19650, Singapore BIM Guide, NATSPEC). Learn the software first, then learn your local standards.
Q4: Should I learn AutoCAD before learning Revit?
No. This is one of the most common misconceptions in architecture education. Revit and AutoCAD are fundamentally different tools — AutoCAD is a 2D drafting application, Revit is a 3D parametric modelling platform. Learning AutoCAD first can actually create bad habits that make BIM harder to adopt. Start with Revit if BIM is your career direction. AutoCAD skills remain useful for reading consultant drawings and DWG file management.
Q5: What is the best free resource for learning Revit online?
Autodesk’s own learning platform (learn.autodesk.com) provides free, structured courses directly from the software maker — this is the most reliable and up-to-date source. The Revit community on the Autodesk forum is active and responsive for troubleshooting. For India-specific tutorials, search for ARCNET’s BIM Foundations series and channels run by practicing Indian architects who teach contextually relevant workflows.
Quick Wins Checklist
Complete these ten tasks in your first week to build momentum and confidence before diving into the full roadmap.
| ☐ | Install Revit and open the default residential template |
| ☐ | Identify the ribbon, properties panel, and project browser |
| ☐ | Open a floor plan view and a 3D view |
| ☐ | Draw four exterior walls to form a simple room |
| ☐ | Insert one door and one window into a wall |
| ☐ | Place a floor slab within the enclosed walls |
| ☐ | Switch to the 3D view and orbit your model |
| ☐ | Create a section view cutting through your room |
| ☐ | Add a basic dimension string to the floor plan |
| ☐ | Save your file and explore the project browser structure |
Continue Exploring
These related articles and resources will extend your BIM learning journey after completing this guide.
- What is BIM? A Beginner’s Guide for Architecture Students — ARCNET BIM Foundations
- Revit Families Explained: The Complete Beginner’s Guide — ARCNET BIM Foundations
- How to Set Up a Revit Project Template from Scratch — ARCNET BIM Foundations
- BIM vs CAD: What Every Architecture Student Needs to Know — ARCNET Architecture Education
- How to Build an Architecture Portfolio as a Student — ARCNET Career Skills
- ISO 19650: A Plain-English Guide to BIM Standards — ARCNET BIM Foundations
- Autodesk Learn: Free Official Revit Training — learn.autodesk.com
- Autodesk Certified Professional (ACP) Revit Exam Guide — certiport.com
CALL TO ACTION
Start Your Revit Journey Today
Download the free ARCNET Revit Skill Tracker.
Track your progress through the 12-week roadmap, mark off each skill as you complete it, and build a portfolio that opens doors to real architecture work.